


Visual representation of Ai concepts in Unreal Engine 5
When developing even the simplest AI that implements sensors and real-world movement, simulating the algorithm inside a virtual 3d world can cut unnecessary costs and speed-up production phases.
Now, why build a 3d engine when there already are incredibly powerful options out there available for free?
Unreal Engine 5 is one of the most anticipated pieces of software in a while, it should bring big performance optimizations on the table in comparison to the previous version, and both Nanite and Lumen, the two main features, seems really promising in terms of what they will allow developers to do.
Innovation aside, there is a big issue that should be addressed as soon as possible by Epic Games, the documentation for Unreal Engine 4 is imprecise and lacking, some of the functions and blueprint nodes are even descripted in the documentation only by their name!
Unreal Engine 5 is currently available on early access, you can imagine that the documentation is simply… not there yet. In the official section of the Epic website https://docs.unrealengine.com/5.0/en-US/ we can see that as of today, there are only 12 pages of docs, describing the main changes.
We would really like to see more from Epic, UE5 should be a big turn also in terms of documentation.
Anyway, today we are going to give you a hint on how to adapt one of the first official UE4 tutorial to the new engine version, embedding an overly simplified C++ AI into a basic Pawn (an actor with the ability to move and in the environment and be controlled by a GameController).
To start we need two things:
- Unreal Engine 5 Early Access
- Visual Studio 2019
Configuring Visual Studio 2019 for unreal engine use is a bit complex, we suggest you to follow the official guide: https://docs.unrealengine.com/4.27/en-US/ProductionPipelines/DevelopmentSetup/VisualStudioSetup/
Let’s start with a blank project.
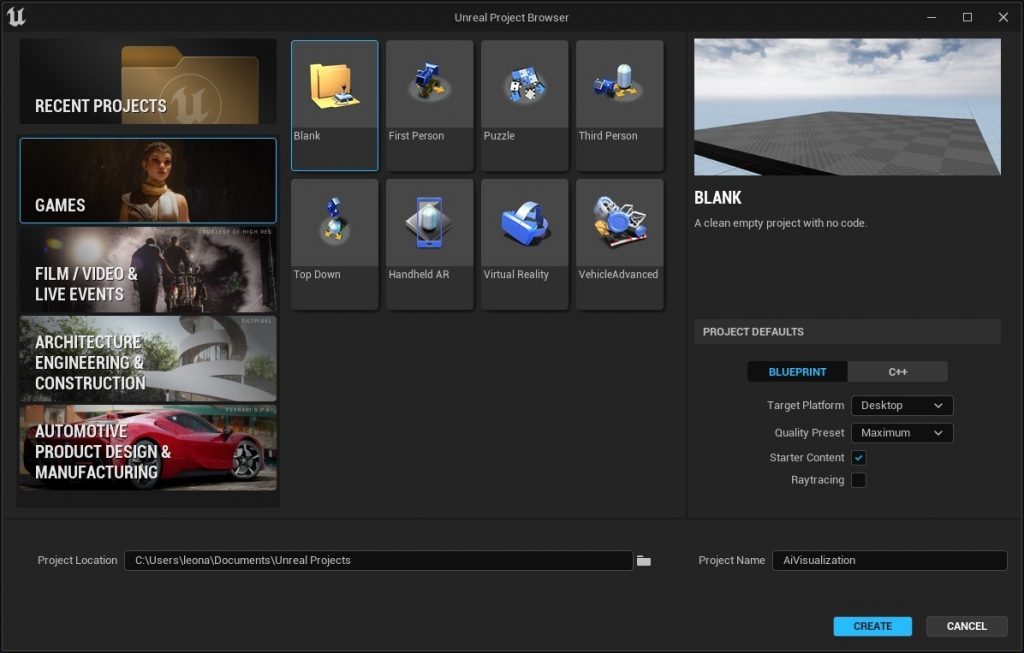
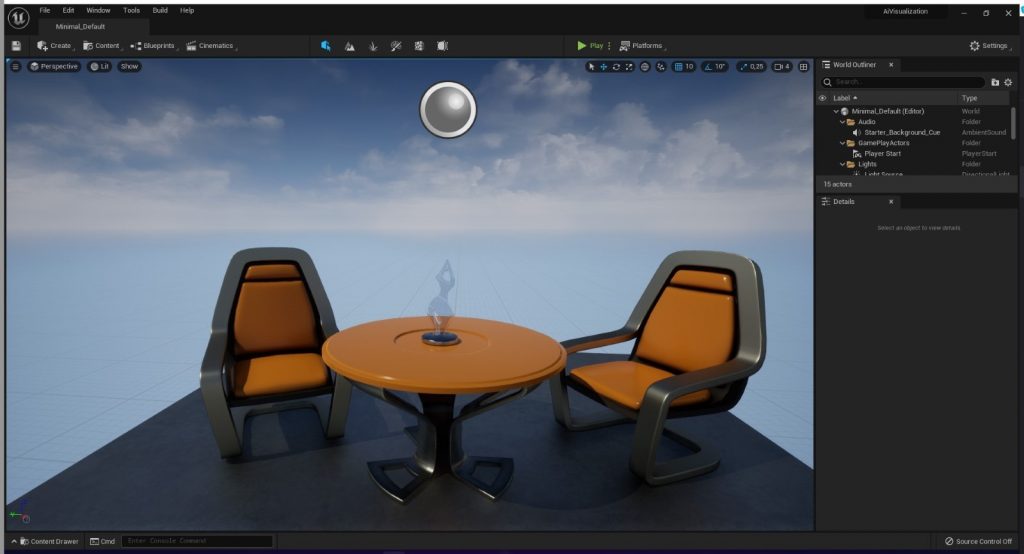
Inside the editor, this is what should be visible:
The option to create a new C++ class has been moved, now it’s under
Tools -> New C++ Class
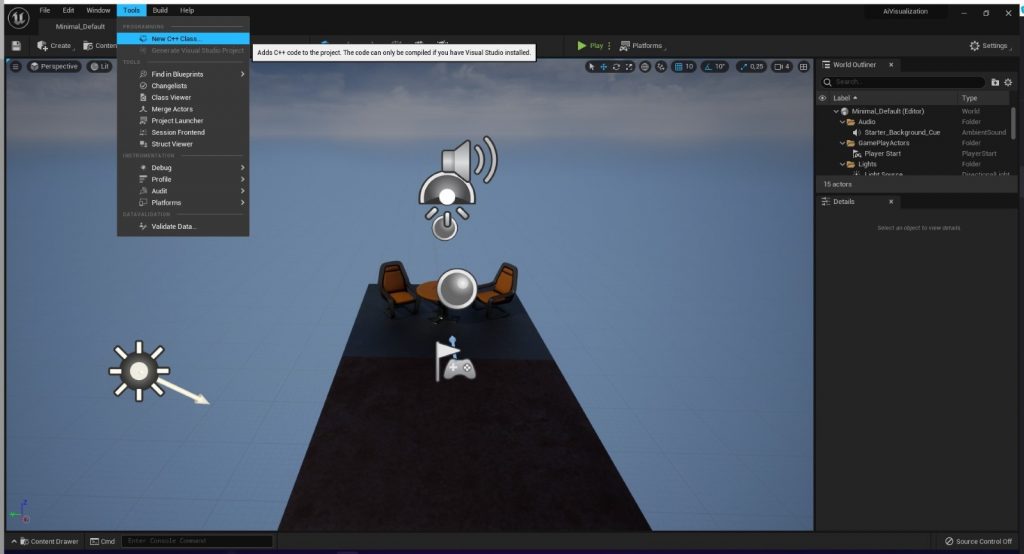
We need to create and Pawn, let’s select that option.
If UE5 prompts you to open the log because “an error occurred”, you will probably find inside it a request for a specific .NET version, in our case it was .NET 3.1, this requirement changes on the base of the UE and VS versions. We were able to meet the requirement installing the following package: https://dotnet.microsoft.com/download/dotnet/3.1
After Visual Studio takes its time to load, this is the basic script:
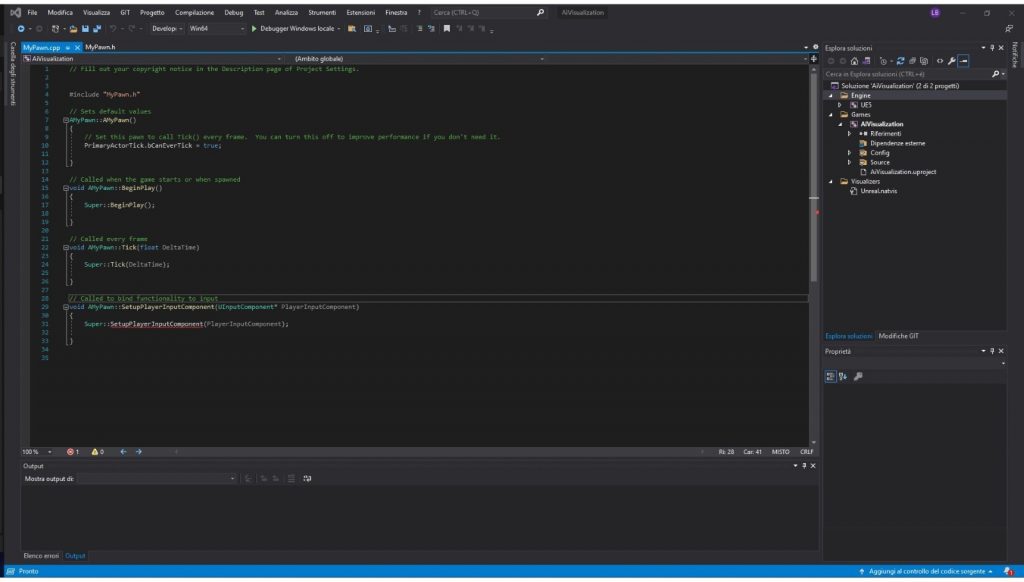
Adding
public:
	// Sets default values for this pawn's properties
	AMyPawn();
	UPROPERTY(VisibleAnywhere)
	UStaticMeshComponent* VisualMesh;
To the MyPawn.h (the header) under the “public” label, will add a StaticMesh componet to the actor, allowing us to edit his visual appareance.
Setting the constructer AMyPawn:AMyPawn in MyPawn.cpp:
AMyPawn::AMyPawn()

{
	// Set this pawn to call Tick() every frame.  You can turn this off to improve performance if you don't need it.
	PrimaryActorTick.bCanEverTick = true;

	VisualMesh = CreateDefaultSubobject<UStaticMeshComponent>(TEXT("Mesh"));
	VisualMesh->SetupAttachment(RootComponent);
	static ConstructorHelpers::FObjectFinder<UStaticMesh> CubeVisualAsset(TEXT("/Game/StarterContent/Shapes/Shape_Cube.Shape_Cube"));

	if (CubeVisualAsset.Succeeded())
	{
		VisualMesh->SetStaticMesh(CubeVisualAsset.Object);
		VisualMesh->SetRelativeLocation(FVector(0.0f, 0.0f, 0.0f));
	}
}
Will set a cube as the default static mesh of the class.
Building the project, reloading the Unreal Engine project and placing the new actor in the world from the content manager leads to this situation:
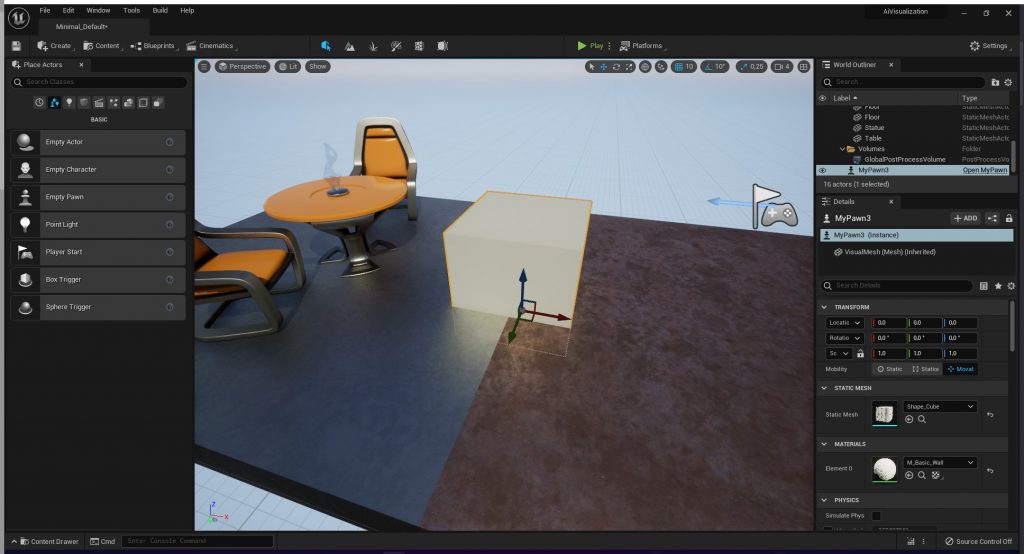
Our objective is to visually test a simple AI concept that we have previously designed, for this article lets imagine we have thought of testing a concept of aggregation.
Something like this:
-> Get all similar agents
-> Get closest agent
-> Get closer
With UE5 we can test this concept.
All we need is to edit the AMyPawn:BeginPlay() function.
Getting all the similar agents:
void AMyPawn::BeginPlay()

{
	Super::BeginPlay();
	TArray<AMyPawn*> Actors;
	FindAllActors(GetWorld(), Actors);

	for (int i = 0; i < Actors.Num(); i++) {
		GEngine->AddOnScreenDebugMessage(-1, 15.0f, FColor::Red, TCHAR_TO_ANSI(*Actors[i]->GetName()));
	}

}
Now if we build the project and start the game, we get the log of all the MyPawn instances present in the game, keep in mind that every instance repeats this operation so if we place 3 instances, we get 9 logs:
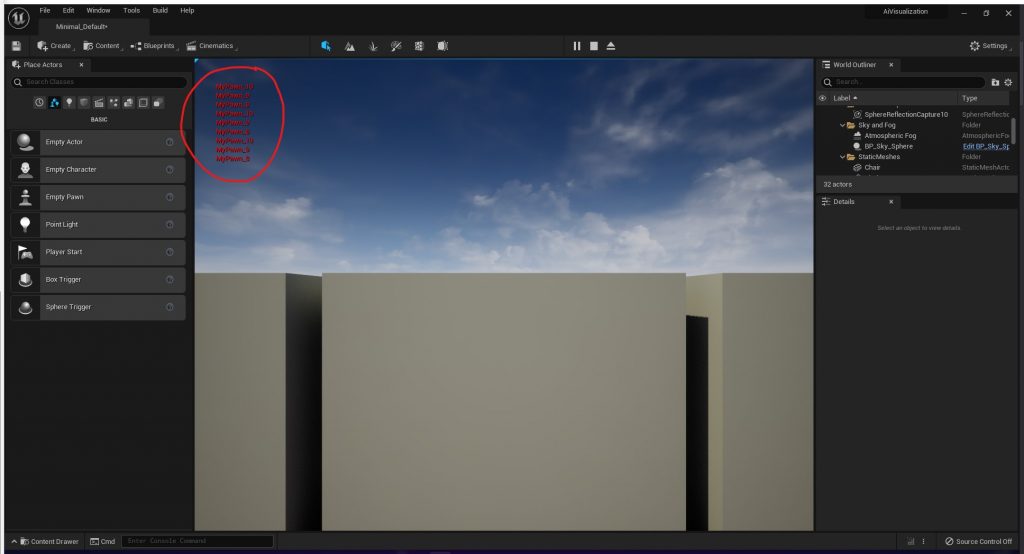
Onto the “Get closest agent task”, modifying the current loop we can save the closest actor:
void AMyPawn::BeginPlay()
{
	Super::BeginPlay();
	TArray<AMyPawn*> Actors;
	FindAllActors(GetWorld(), Actors);
	float minDist = -1;
	AMyPawn* closestActor;

	for (int i = 0; i < Actors.Num(); i++) {

		// GEngine->AddOnScreenDebugMessage(-1, 15.0f, FColor::Red, TCHAR_TO_ANSI(*Actors[i]->GetName()));

		float newDist = GetDistanceTo(Actors[i]);
		if ((newDist < minDist || minDist == -1) && Actors[i] != this){
			minDist = newDist;
			closestActor = Actors[i];
		}
	}
}
This step was simple, this is basic c++. Now the interesting part, let’s move the current instance closer to the closest same-class actor.
if (closestActor != this) {

		SetActorLocation(FVector((closestActor->GetActorLocation().X + GetActorLocation().X) / 2,

			(closestActor->GetActorLocation().Y + GetActorLocation().Y) / 2, (closestActor->GetActorLocation().Z + GetActorLocation().Z) / 2));

		GEngine->AddOnScreenDebugMessage(-1, 15.0f, FColor::Red, TCHAR_TO_ANSI(*closestActor->GetName()));
	}

	char minDistChar[10];
	sprintf(minDistChar, "%f", minDist);
	GEngine->AddOnScreenDebugMessage(-1, 15.0f, FColor::Red, minDistChar);
After a quick build, we are done!
We can simulate the result with Alt + S, or by clicking Play -> Simulate.
We suggest as an exercise that you try adding a MovementComponent and use AddInput to sobstitute this brutal “Snap” that SetActorLocation provide.
Leonardo Bonadimani
Filosoft